POCKET PAM 2 - USING THE MAPS
Have you tried using the PocketPAM2 mapping features yet? We have found that many users prefer to use their farm map for selecting their paddocks for data entry & viewing data. There are lots of useful features in the PocketPAM2 Mapping Module. Let's explore them...
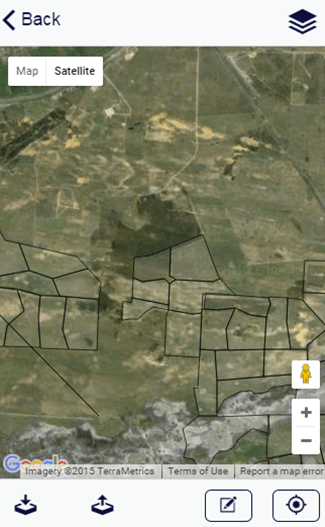
The Mapping module uses the Google Maps system with full access when you are connected to the internet.
Features include:
• Linked Paddock Polygons are uploaded to Pocket PAM
• Other layers from your PAM Mapping module can be uploaded to PocketPAM.
• New objects (polygons, lines and points) can be drawn manually and also drawn “live” by the GPS in your device as you move.
• Map reports - View cropped areas and paddocks with livestock on the map
• Enter cropping and livestock data via the map
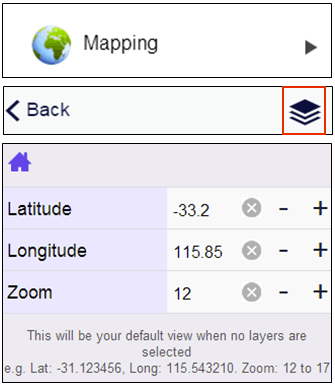
Create a Home View
1. Tap “Mapping” from the main menu of PocketPAM.
• When you first open the mapping module, you will be asked if want to allow the program to use your current location. Tap “OK”. The screen will locate itself at your current location.
2. Zoom in or out to suit your needs using your fingers on a Smartphone/Android Tablet/iPad or the mouse wheel if using a PC.
3. Tap the “Layer Manager” button.
4. Enter the “Latitude” and “Longitude” of the center of your home view using the “-“ and “+” buttons.
5. Enter the zoom value using the “-“ and “+” buttons to determine the area that will be displayed.
Layers From PAM
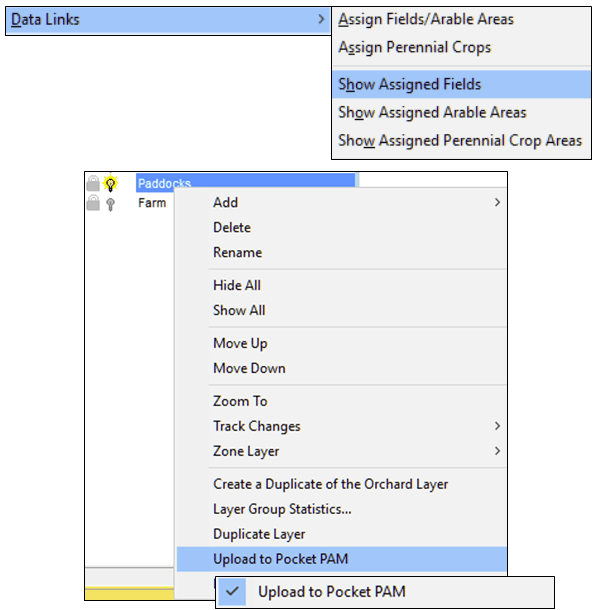
• In PAM Mapping: click on the “File/Tools” menu, choose “Data Links” then “Show Assigned Fields. The assigned (linked) paddocks will show on your screen, filled with yellow.
• For more information check out the “Mapping Data Links” video on the Fairport website.
• To ensure all the new features work for you in the PocketPAM mapping, get the data from PAM for the Crop Diary and for Livestock (if applicable).
• Also, any layers that you have nominated for sending to PocketPAM will be fetched.
• To nominate layers for PocketPAM, right click on the layer name and choose “Upload to Pocket PAM” on the menu. A tick will be shown on the menu.
• Any time you want to stop a layer going to PocketPAM, simply select the menu option again and the tick will disappear.

To exchange mapping data with your PAM mapping module, use the ‘to PAM’ and ‘from PAM’ buttons on the mapping home screen.
Using the “Linked” Layer
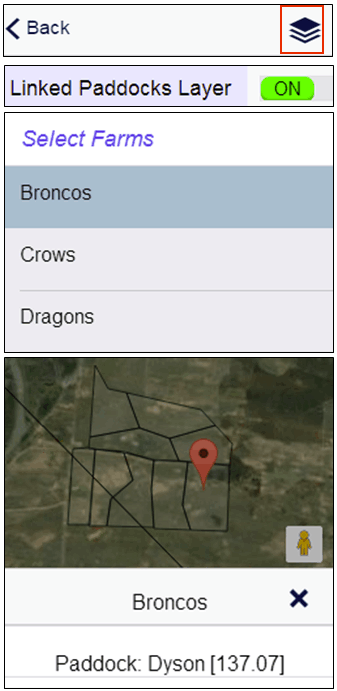
For the “Linked Paddock” layers to work as expected, you must first ensure that you have linked all your paddock polygons (or circles, if you have center-pivot areas). If you are unsure how to do this process, please check the videos on the support pages of the Fairport website for full details.
1. Tap the “Layer Manager” button.
2. Use the “ON/OFF” slide to turn the Linked Paddocks Layer ON.
3. Filter the map display by selecting one or more farms.
• If you select none, all of your farms will be displayed on the map.
4. Tap ”< Back”.
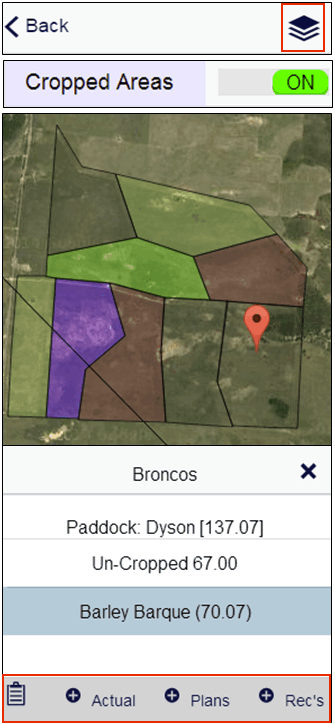
Working with Cropped Areas
1. Tap the “Layer Manager” button.
2. Use the “ON/OFF” slide to turn the Cropped Areas layer ON.
• Cropped areas are coloured by their crop type. If there is more than one crop growing in a paddock, it will show the colour of just one of those crop types.
3. Tap on one of the paddocks or blocks to display the Info panel.
4. Activate the “Clipboard”, “+Actual”, “+Plans” or “+Rec’s” buttons by tapping on the Cropped Area name row.
• Tap on the “Clipboard” button to generate the Annual Paddock/Block Summary report.
• Tap on the “+Actual” button to add an actual event record.
• Tap on the ”+Plans” button to add a new event plan.
• Tap on the “+Rec’s” button to add a recommendation.
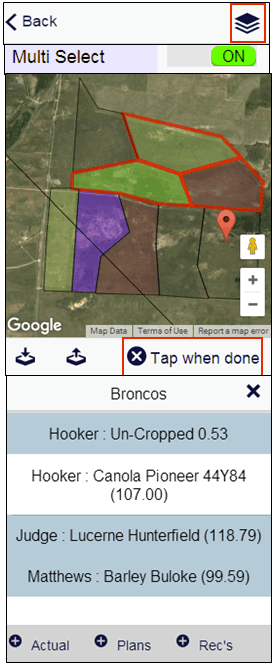
Multiple Paddocks
1. Tap the “Layer Manager” button.
2. Use the “ON/OFF” slide to turn the Multi Select option ON to add a record (Actual, Plan or Recommendation) for multiple Paddocks/Blocks.
3. Tap on each area.
4. Tap the ”Tap when done” button when all areas have been selected.
5. The areas selected will be shown on the pop up screen.
• To deselect any areas that you don’t want to include in the job tap on its name.
6. Tap on the type of record you want to create.
• You will be taken directly to the Crop Diary screen where you choose the activity or activities. Your area will be pre-selected for you.
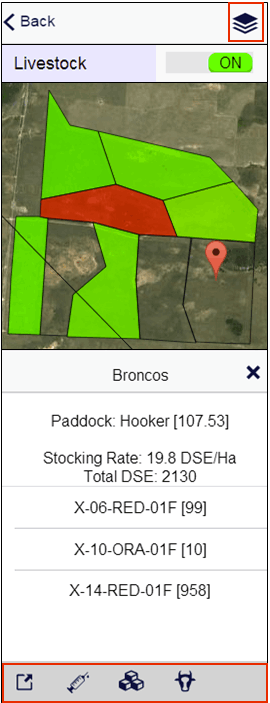
Working with Livestock
1. Tap the “Layer Manager” button.
2. Use the “ON/OFF” slide to turn the Livestock layer ON.
3. The paddocks are coloured by stocking rate:
• Red = High stocking rate
• Green = Low stocking rate
4. Tap on each area to display the mobs and Info panel.
5. Activate the “Move”, “Treatment”, “Feed” or “Alter” buttons by tapping on the mob(s).
• Tap on the “Move” button to add a mob movement.
• Tap on the Treatment” button to add a treatment.
• Tap on the ”Feed” button to add a feeding record.
• Tap on the “Alter” button to alter mob numbers.
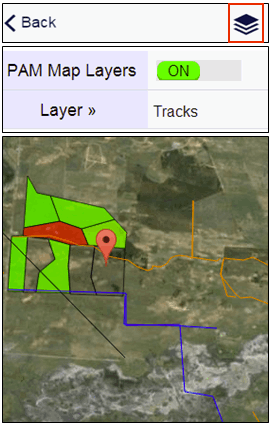
Working with PAM Mapping Layers
1. Tap the “Layer Manager” button.
2. Use the “ON/OFF” slide to turn the Cropped Areas layer ON.
• The layers that you nominate in the PAM Mapping layers list for uploading Pocket PAM are displayed in PocketPAM.
3. Tap on the “Layer” field to select a layer from the pop up menu.
4. Tap ”< Back”.
The PAM Mapping Layers are not transferred back to PAM and it is not possible to edit them in PocketPAM.
If you need to add PAM Mapping features in PocketPAM you would use the Drawing tools while in Drawing Mode.
Send Drawn Objects and Waypoints to PAM
Three types of mapping data get sent back to PAM.
gpsScout Coordinates
To send gpsScout coordinates back to PAM, tap on the “to PAM” button on either:
• the gpsScout module home page or
• the Crop Diary module home page or
• the main home page of PocketPAM.
Waypoints & Drawn Objects
To send these mapping data types back to PAM, tap on the “to PAM” button on either:
• the Mapping module home screen, or
• the main home page of PocketPAM.
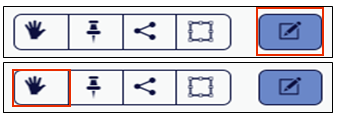
Drawing Mode
• Tap the “Drawing Mode” toggle button to show or hide the Drawing Panel.
• Tap the “Hand” button to get out of a drawing mode and back to using your finger to pan
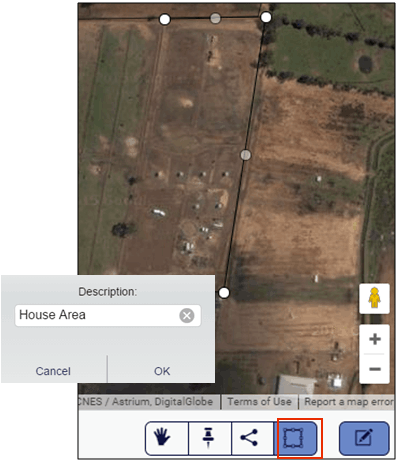
Drawing Polygons
1. Tap the “Polygon” button to get into Polygon drawing mode.
2. Tap on each corner of the area you want to draw.
3. Double tap when done.
4. Add a description for the new polygon.
5. Tap “OK”.
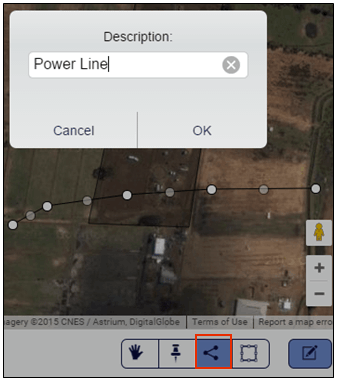
Drawing Polylines
1. Tap the “Polyline” button to get into polyline drawing mode.
2. Tap on each corner in the line.
3. Double tap when done.
4. Add a description for the new polyline.
5. Tap “OK”.

Drawing Point
1. Tap the “Drawing Point” button get into drawing point mode.
2. Tap on the spot where you want your point.
3. Add a description for the new point.
3. Tap “OK”.
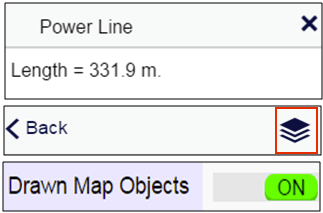
Drawn Objects Information
• Tap on your drawn objects when no longer in a drawing mode to slide up an information panel showing the description of the object and either the length (polylines) or the area (polygons).
1. Tap on the “Layer Manager” button.
2. Tap on the “Drawn Map Objects” ON/OFF slide to show or hide the objects.

Tracking Mode ON/OFF
Tracking mode turns your mapping screen into a live map which will show your current position in the center of the screen.
When in this mode you can:
add Waypoints and record gpsScout records.
This is the ONLY way you will be able to record coordinates with crop monitoring records.
1. Turn on Live Tracking by tapping the “Tracking” button.
2. “Tracking…” will appear on the toolbar.
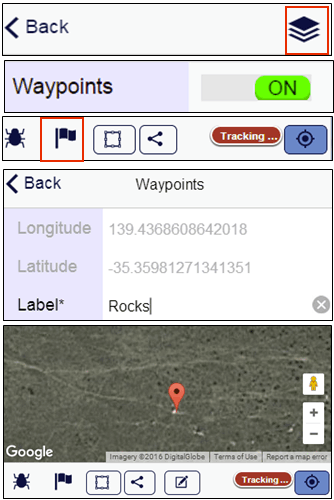
Adding a Waypoint
Creating a point with a description at the current location as opposed to drawing points where you can place a point manually wherever you want.
Tip: It’s a good idea to turn the Waypoint Layer on before you begin collecting waypoints
1. Tap on the “Layer Manager” button.
2. Use the “ON/OFF” slide to turn the Waypoints Layer ON.
3. Tap on the “Waypoint” button to add a waypoint.
4. Enter a name for your waypoint in the “Label” field.
5. Tap “< Back”.
6. The waypoint will now be shown provided your Waypoint Layer is turned on.
7. The waypoints collected will appear in the PAM Mapping layers when you next send your data to PAM.
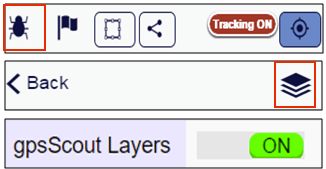
Adding a gpsScout Record
1. Tap on the gpsScout button to display the gpsScout screen with the coordinates already entered.
2. Complete the crop monitoring record as required.
3. Tap the “< Back” button to return to the mapping screen.
It is a good idea to have the gpsScout map layer turned on. If there aren’t any gpsScout points in your database, this will not be possible. So, as soon as you have taken your reading gpsScout record, go the Layer Manager and turn on that layer.

Job Photos
Take 1 or more photos for any Crop Diary or gpsScout job … send them back to PAM. They are kept linked to your jobs in the Job Notes window.
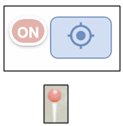
Live Mapping
PocketPAM introduces live drawing of lines and areas (polylines and polygons in ‘mapping-speak’)
To put your device into live mapping mode, you must first turn on live tracking.
Your screen should locate to your current position and be marked by a pin marker.
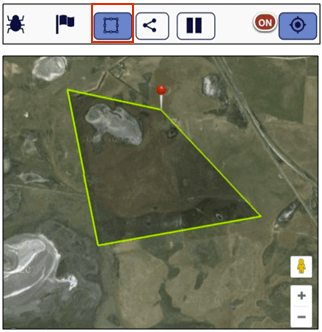
Draw an Area/Polygon
1. Tap on the “polygon” button.
2. Start moving.
• If you travel more than 50 meters, or if you change direction by 3 degrees or more, a point will be created.
3. To finish the polygon, tap the “polygon” button.
4. Enter a description.
5. Tap “OK”.
6. Tap “OK” to find your new area object on the Drawn Map Objects Layer.
• You will still be in Tracking Mode.

Draw a Line
1. Tap on the “polyline button”.
2. Start moving.
• If you travel more than 50 meters, or if you change direction by 3 degrees or more, a point will be created.
3. To finish the polyline, tap the “polyline” button.
4. Enter a description, e.g. pipeline, powerline, road)
5. Tap “OK”.
6. Tap “OK” to find your new area object on the Drawn Map Objects Layer.
• You will still be in Tracking Mode.
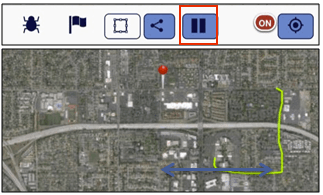
Pause
1. Tap on the “pause” button to stop adding new points.
• Tracking will continue.
2. To start drawing again, tap the “pause” button.
• There will be a gap showing the distance travelled while paused.
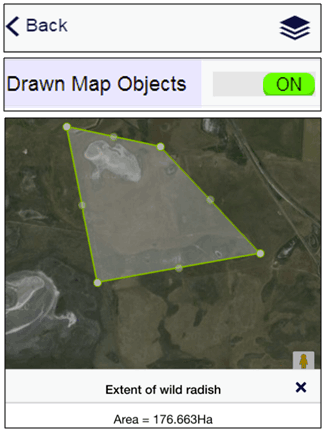
View Drawn Map Objects
1. Tap on the “Layer Manager” button.
2. Use the “ON/OFF” slide to turn Drawn Map Objects ON.
3. Tap on the drawn object to display the area and your description.